
Hand sewing basics: Knots
- Feb 26
- 3 min read
Updated: Mar 5

One of the first things you do when hand sewing is to tie a knot in your sewing thread. Not doing this properly may result in your stitches unravelling, which you want to avoid at all costs.
There are a number of different knots any 'sewist' should be familiar with. Which knot you use depends on where you position it:
Starting knots are tied at the end of the thread before you start sewing, and finishing knots are tied just before you snip off the last bit of thread after you have finished sewing.
Most people have a favourite go-to knot which comes naturally to them and they can do with their eyes closed. Mine is the quilter's knot, but you may prefer one of the others.
Before your start sewing
Have you got the right tools in your sewing kit? Download this checklist for your sewing kit which includes a useful guide on different types of thread and hand sewing needles.
Starting knots
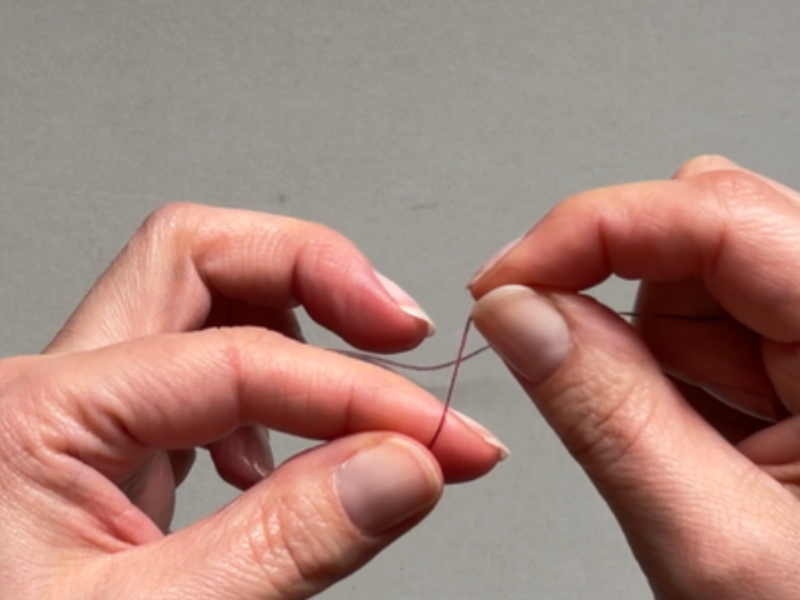
Quilter's knot (knot on the needle)

1
Thread the needle and point the tail end of the thread towards the tip of the needle.

2
Pinch the tail end and needle together and use your other hand to wrap the thread in between around the needle three times.

3
Holding all the wraps tightly between your thumb and index finger, pull the needle and thread through until a tight knot forms.
Finger wrap knot
1
Thread the needle and wrap the tail end of the thread around your index finger.

2
Insert the needle into the loop of thread on your finger (with the eye side of the needle first, so you don’t prick your finger). Do this three times.

3
Pull the needle through, slip the loops of thread off your finger, but pinch them against your fingertip with your thumbnail and pull on the needle until a tight knot forms.
Rolled knot

1
Wrap the tail end of the thread around your index finger once, forming an X.

2
Pinch the X between your thumb and index finger and start rolling the thread by moving your thumb forwards while moving your finger backwards.

3
Slide the rolled thread off your finger and pinch it as you pull the long end of the thread away from your thumb and finger - knot will form.
Finishing knots
The tailor's knot is one of the easiest knots, but it is not necessarily the most secure. You would use this knot when you intend to undo your work at a later stage, for example when tacking pieces of fabric together temporarily. The locking stitch is very secure, but also cannot be undone as easily.
Tailor's knot

1
When you have finished sewing, make a loop in the tail end of your thread.

2
Bring the thread over (2) and insert it (3) into the loop you created in step 1.

3
Insert a needle or pin into one of the loops and point it next to where the thread leaves the fabric. When pulling the thread tight, move the knot along the needle as close to the fabric as you can.
Locking stitch

1
Make a small stitch parallel to your last sewing stitch, but instead of pulling the thread tight, leave a small loop.

2
Insert the needle into this loop from the back. If you pull the thread tight here, you already have a pretty good locking stitch, but for extra security, leave another loop here and move on to step 3.

3
Bring the needle to the back and insert it from underneath into the second loop. Now you can pull tight and you will have a highly secure finishing knot.


